The short version
- Stress-crazing at the lower corners is the single most common end-of-life cause.
- A vacuum dent is not cosmetic — it permanently reduces usable volume and concentrates stress.
- A sixty-second inspection at every fill catches seven of the nine failure modes.
- Chemical swelling is the one failure you cannot fix and should never risk.
Why anyone should care about this
A bottle that fails in our yard costs us $58. A bottle that fails in your warehouse costs you a clean-up, a lost batch and possibly a regulatory conversation. The difference between those two outcomes is almost always somebody spending sixty seconds with a torch at fill time.
I grade somewhere north of eight hundred containers a week. What follows is what I actually look for, in the order I look for it, and what each finding means for whether the container has months or years left in it.
The nine failure modes
| # | Failure | Share of scrap | Warning sign | Lead time |
|---|---|---|---|---|
| 1 | Stress-crazing (lower corners) | 46% | Fine white network in the HDPE | Months |
| 2 | Base bulge and thinning | 14% | Base sits proud of the pallet deck | Weeks to months |
| 3 | Vacuum collapse | 11% | Inward dent on the top panels | Immediate, then permanent |
| 4 | UV embrittlement | 9% | Chalky surface, dull colour, brittle feel | Years |
| 5 | Chemical swelling | 7% | Soft, tacky or dimensionally distorted wall | Days to weeks |
| 6 | Outlet flange distortion | 5% | Persistent weep after a new gasket | Immediate |
| 7 | Freeze stretch | 4% | Bowed lower panels after a cold snap | One winter |
| 8 | Impact fracture | 3% | None — a forklift tine found it | None |
| 9 | Collar or weld separation | 1% | Bottle sitting unevenly in the cage | Weeks |
Stress-crazing: the one that matters most
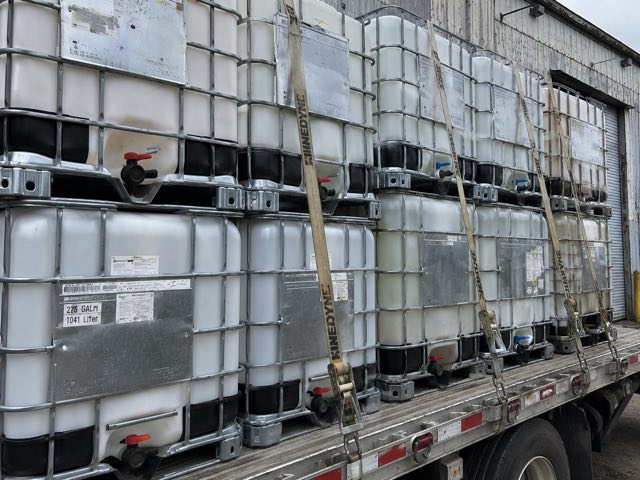
Nearly half of everything we scrap dies of stress-crazing. It shows up as a fine white network of micro-cracks, usually at the two lower corners on the outlet side, sometimes at the shoulders. It is caused by repeated flexing under load — every fill and every draw-down works the material slightly, and HDPE does not forgive that forever.
It is most visible when the bottle is clean and wet, which is why we inspect immediately after washing rather than before. Hold a torch at a shallow angle to the surface and the network lights up. If you can see it from three feet away in ordinary light, that container has one or two cycles left, not five.
The practical rule we use: crazing confined to a patch smaller than a hand, no through-cracks, container passes leak test — it stays in service and gets flagged for re-inspection at the next wash. Crazing running along a corner seam, or any crazing plus a failed leak test, and the bottle goes to the granulator regardless of how good the cage is. That is exactly the situation rebottling exists for.
Vacuum collapse is self-inflicted and completely avoidable
Eleven per cent of our scrap is bottles that somebody drew liquid out of while the lid was sealed. HDPE has almost no resistance to negative pressure. The top panels pull inward, and once they have, they stay in — the dent is permanent, the usable volume is reduced, and the deformed area becomes a stress concentration that crazes early.
A vented lid costs sixteen dollars. I have seen customers scrap four containers in a year for want of one. If you are drawing product out under any kind of flow, fit the vent or crack the lid — there is no third option that ends well.
A dent you can sometimes recover
Chemical swelling: the one to never gamble on
HDPE resists most water-based chemistry very well and is attacked by a specific set of things: aromatic and chlorinated solvents, some ketones, strong oxidisers at concentration, and a few surprising ones like limonene-based cleaners. The wall goes soft, slightly tacky, and dimensionally strange. Sometimes the container looks fine until you fill it.
This is the failure mode where I will not take a customer's word for it. If a container comes in and the wall feels wrong, it goes to granulation regardless of what the paperwork says was in it, because I do not know what actually got put in it afterwards. It is the single largest contributor to the roughly 6% of offered stock we turn away.
And going the other way: send us the safety data sheet before you buy, every time. Chemical compatibility is a fifteen-minute check on our side and it is free. Discovering the answer after you have filled 275 gallons is neither.
The sixty-second inspection
Here is what I would do at every fill if I ran a customer fleet rather than a yard. It takes about a minute and it catches seven of the nine.
Torch at a shallow angle, both lower corners
Looking for the white crazing network. Ten seconds a corner. This is the highest-value part of the whole check.
Look at the base against the pallet deck
A base that sits proud, or bulges past the pallet edge, means the wall has thinned. Common with dense liquids stored for months.
Look at the top panels
Inward dents mean somebody drew down against a sealed lid. Fit a vented lid before it happens twice.
Run a thumbnail across the sun-facing side
A chalky residue on your nail is UV degradation. Cover the container or plan to retire it early.
Press the wall with a thumb
It should be firm and spring back. Soft or tacky means chemical attack. Stop and call somebody.
Check the outlet flange and the gasket seat
Distortion from over-torquing shows as an uneven gasket witness mark. New gasket, correct torque, re-check.
Check the pallet and the base ring
Soft spots, cracked deck, corrosion. A good bottle on a failing pallet still ends up on the floor.
Written by Desmond Okafor, yard manager at IBC Totes San Francisco. Published April 8, 2024. Spotted something wrong? Tell us — we would rather fix it than defend it.